Effects
Using KoolMoves General Effects
You have about half a dozen powerful effects that can be applied to any shape, group of shapes, text, imported SWF movie, or movie clip (Fade In/Out, Expand, Shrink, Zoom In/Out). The effects are found under Effects menu bar, on the Effects tab of the Properties popup, the Effects view of the Score popup, and for the Basic Skills interface on the tools toolbar. First select a shape and then select the effect. Most of the effects occur over several key frames and you can specify how many key frames when you create the effect or at a later time by using Effects > Modify or by editing the effect in the Properties popup. You can also combine effects in many cases. Just add another effect.
A special kind of effect called motion script uses sophisticated Flash 5 action scripting to create the effect. Each of these motion scripts is highly customizable. Motion scripts cannot be combined with other effects.
The advantage of the regular built in effects like fade in and zoom in is that they can be applied to any object and they preserve any frame-by-frame user imposed color, shape, and position changes. The advantage of the action script-based effects is that they are more unique and are highly parameterized.
Shapes with a motion script effect are displayed in the editing screen with a surrounding blue dashed box. Other effects are displayed with a green dashed box.
Using Text Effects Templates
KoolMoves provides a library of text effects templates. Select Libraries > Text Effects. These are regular KoolMoves .fun files which provide the layout and motion paths for text effects. You enter your text and font selection and the software performs the text and font replacement. Select a text effect from the selection of text effects on the left. You can see the text effect in realtime on the right, superimposed over the background movie.
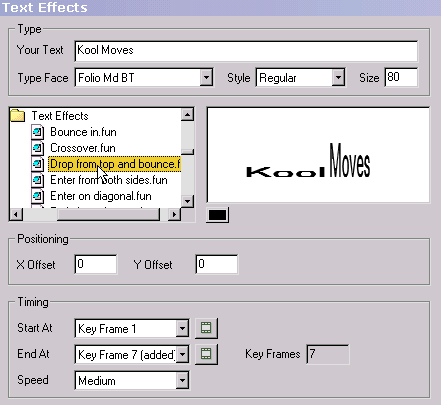
Under the animated text effect, there are colored buttons. Each button represents a color in the template. You can change the colors of the text effect by pressing these buttons and selecting different colors.
To reposition the text effect on the screen, change the values of the X Offset and Y Offset. Zero offsets correspond to a centered position.
To change where the text effect starts relative to the underlying movie, select a Start At key frame. Frames that exceed the current length of the movie have "added" in parentheses. The button to the right allows you to view that key frame. The text effect has a natural frame length which is reflected in the End At key frame. You can override this if you want to stretch the text effect to cover more of the underlying movie. In most cases, you will not need to change the End At key frame. Changing the End At key frame does not affect the speed of the text effect because as you lengthen the text effect, the tweens for each frame are decreased. To control speed independent of number of key frames, set the Speed at a setting between Very Slow and Very Fact or change the speed of the main movie (Movie > Movie Speed). The Speed setting affects the number of tweens between the frames.
To add the text effect to the underlying movie, press Add. You are free to use any of the positioning, coloring, and transform tools to edit the text effect at this time or you can undo the text effect by pressing the Undo button.
If you want the last frame of the text effect to play for a long time, increase the number of tweens for the previous frame or duplicate the last key frame a number of times using Frames > Insert Copy of Frame. Also, you can use Edit > Paste to End of Movie to paste the text characters in the last frame of the text effect to the remainder of the movie.
Creating Your Own Text Effect
It is easy to create your own text effects. The basic principle is to create the stages of the text effect in a series of key frames. This example illustrates a series of letters which write on the screen starting very large and transparent.
![]()
 In step 1, the text tool is clicked and a single letter is entered. The size of the letter does not matter because we are going to scale it. The letter is shown on the right.
![]() In step 2, the letter is made transparent using the paint bucket tool.
In step 2, the letter is made transparent using the paint bucket tool.
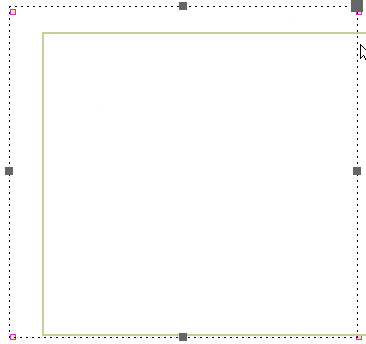 In step 3, the letter is scaled to a very large size using the scaling tool.

In step 4, the current key frame is copied and added to the end of the movie.
 In step 5 in the last key frame, the letter is scaled to the final size using the scaling tool.
 and the transparency is removed using the paint bucket tool.
 The current key frame is copied to the end of the movie and the process is repeated for the next letter in this case "o". And so on for each letter. Some fiddling of the sizes of each letter will be necessary to produce a polished look.
When the movie is played, the effect is that each letter appears in sequence. The text effects you can create are endless.
Creating Your Own Transition
It is easy to create transitions. The basic principle is to create the stages of the transition in a series of key frames. This example illustrates an image that comes from the left into the movie frame as a small transparent image and becomes more opaque and larger as the image moves to the center of the movie frame. Later, several built-in transitions will be discussed.
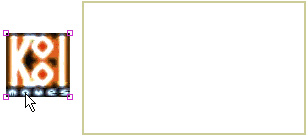 In step 1, an image is imported using File > Import Graphic Image. To start the transition, the image is dragged to the left of the movie frame.

 In step 2, the image is made small and transparent using the scale and paint bucket tools.
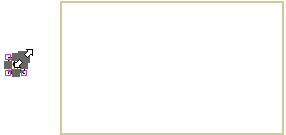

In step 3, the current key frame is copied and added to the end of the movie.
 In step 4, the image is dragged to the center of the movie frame in the last key frame.
 Finally in the last key frame, the paint bucket and scale tools remove the transparency and return the image to its original size.
When the movie is played, the image slides in from the left from a transparent, small state. The transitions you can create are endless.
KoolMoves has 6 built-in transitions -- initial fade in, final fade out, initial grow from nothing, and final shrink to nothing, initial zoom in and final zoom out. They take effect at the beginning or end of the shape's life in the movie depending on whether the transition is called initial or called final. These transitions can be set in the Properties popup for the selected shape or through the Effects menu bar. Transitions occur over a set number of key frames. When a transition is added to a shape, if there aren't enough frames for the transition to occur, frames will be added if the "Add frames if needed" check box is checked. Transitions can be combined, although the fade transitions are not a good combination with drop shadow.